One of my hobbies is building robots. The largest one to date is this (me for scale):
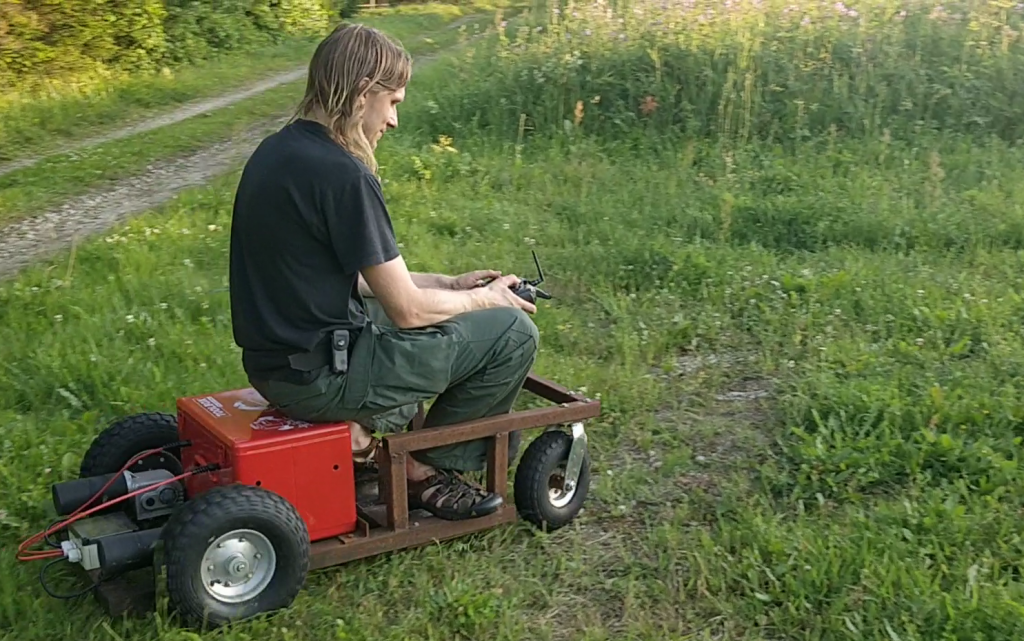
I created it as a general large platform for outdoor experimentation that would be able to take on various practical tasks in a more or less autonomous manner.
What I didn’t anticipate is how hard it is to build such a platform in a way that is both economical and reliable.
While it does work in general, the Mean Time Between Failure has proven to be somewhere in the range of an hour or so.
When something major breaks, the robot goes back to the parking lot waiting for the next season while I contemplate if I want to spend more resources on fixing it. So the progress on this project has been rather slow to put it mildly…
Anyway the first idea was to use it as an autonomous lawnmower. I did get around to doing some mowing experiments with a single blade as you can see in this video:
As you can see the mowing part works, but it isn’t particularly impressive. Adding the second cutting motor would have helped a bit as would using a single large blade with a more powerful motor like the one that is used in commercial cordless mowers like Makita DLM380.
But in general this chassis seemed just too powerful and dangerous for an autonomous mowing operation in the garden. Nowadays Ardumower seems like a much better base for autonomous mower projects.
Personally I also lost interest in the specific problem of mowing several years ago since it isn’t a personal itch anymore — I have sheep nowadays to keep the grass at a reasonable height.
So anyway I decided to repurpose the robot for watering plants in the field.
It’s something that I potentially actually need, requires quite a bit of carrying capacity and the work happens out in the field where it can’t cause that serious damage when it goes out of control. It also tried the job of the sheepdog for a while 😛
Motors
The motors that I use are really old 24V wheelchair motors. These motors seemed a really good fit for my purpose because of the high torque and generally robust construction.
They are really hard to source though at a reasonable price (new ones go for min. 400+EUR/pair) and it’s hard to connect these to any wheels that are cheap and fit for agricultural purposes.
I managed to find a local wheelchair repairman who sold a pair of these for 25EUR but the downside is that these are old used ones are rather one-off and in unknown condition. You are lucky to get a matched pair and mine had an obscure shaft with a keyslot. If one motor fails you will probably have to find another pair which likely has a bit different dimensions, shaft length, -diameter and type which would require a bit of redesign.
The spiral spring holding one of the brushes in place on one of the motors rusted through. Finding a suitable replacement spiral brush spring seemed rather hopeless so I patched it with a random spring of completely different type. It kind of works but is somewhat unreliable — it sometimes loses contact and needs a tap on the back.
During the last couple of years brushless hub motors have been coming down in price and I think nowadays I would go with these instead. Finding ones that are wide enough with at least 14.5″ diam and shipping price that wouldn’t be half the price is still a challenge though.
Wheels
I decided to use wheelbarrow wheels since there’s a wide selection available, there are rather wide ones with a large diameter that are suitable for rugged terrain and they are cheap.
Attaching these to the shaft is tricky though, since wheelbarrow wheels are generally built with the idea that you put a rod through them which rests on a bearing.
I decided to use an industrial taped bore and just drill matching holes through the wheelbarrow wheel rim. The best rim that I found was a bit conical though, which made it almost impossible to perfectly center the taper bore on it.
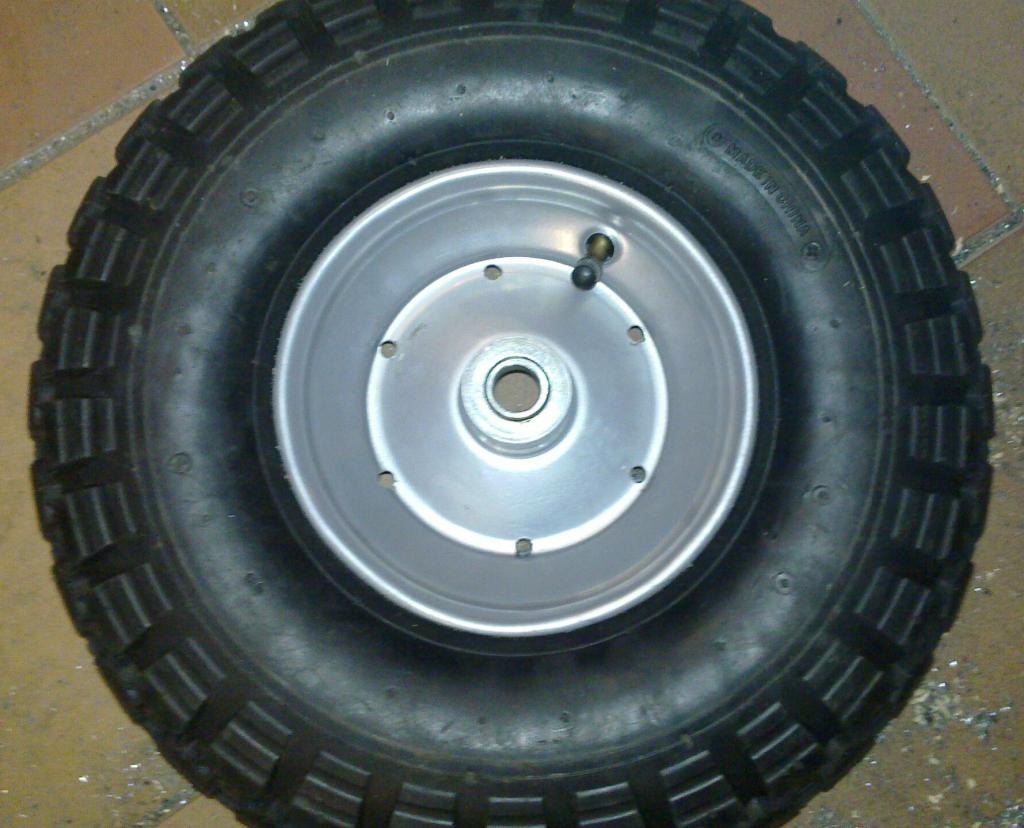
To attach it to the wheelbarrow wheels I had to find a shaft key, taperlock bush for that particular shaft and key size and a fitting taper bore.
These I had to order from different suppliers from the other side of the world which took quite a while. I didn’t actually find perfectly matching ones so I had to hammer and file it a bit and you can see on the picture that the taperlock bush has actually cracked:
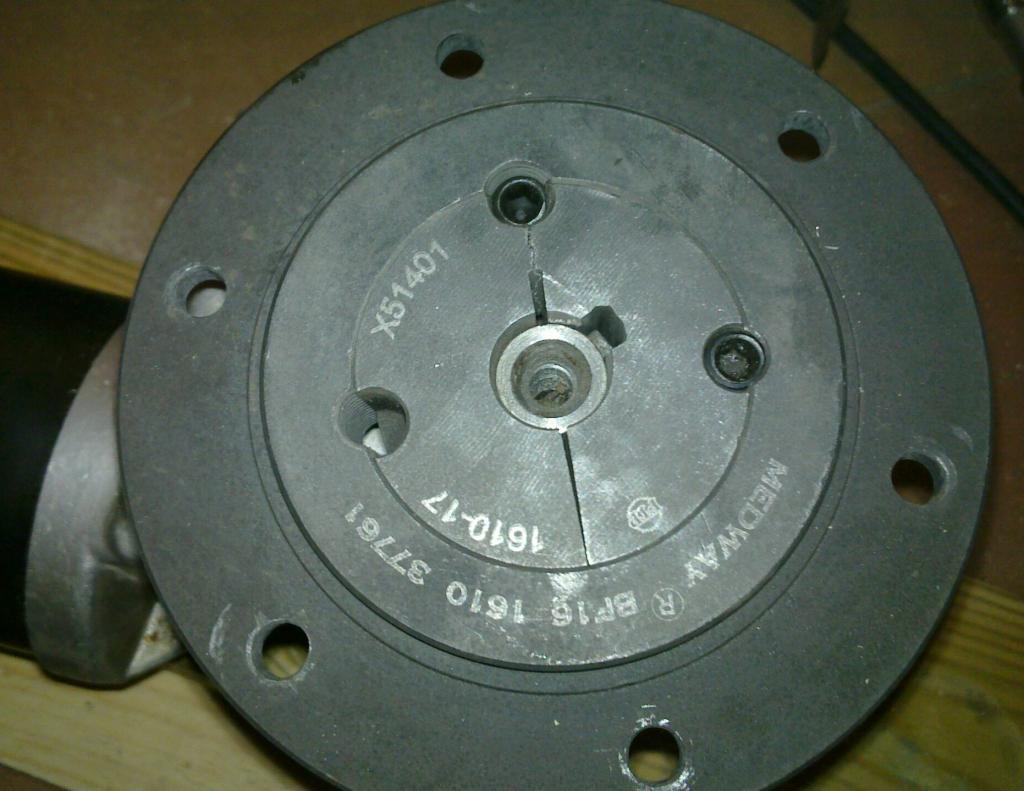
Looking back at the effort spent, ordering a special made one from some local metalworks company would probably have been easier and maybe even cheaper.
The battery
The first generation used two Exide ES650 lead-acid deep cycle gel batteries in series. One of these failed though a bit after the end of the warranty. I only managed to use it for a couple of hours in total over these two years because chassis-motors-wheels took unexpectedly long to complete.
That battery failed after I used it to start a car with a dead battery once, which is kind of strange.
While deep cycle batteries aren’t certainly meant for that, I don’t think getting it damaged with using it for starting once is the expected result.
Anyway, having lost one battery I had a choice of either buying a new one for the pair or switching to some other battery chemistry completely.
While still having one usable battery would have made replacing just the other somewhat simpler and certainly cheaper proposition in the near term. In the long term this looked like a dead end though.
These batteries seem to have an expected lifetime of around 5 years and the functioning one was approaching that even though it has seen barely any actual use.
Also the energy density is obviously a lot lower than for many more modern chemistries.
I didn’t like to go with Li-Ion batteries based around 18650 cells that are otherwise rather popular with DIYers, since reading the forums of the communities shows just how fickle these can be and how much attention to the detail is needed.
Treating these batteries in just the right way for them to last more than a thousand or so cycles seems to be a science in itself and there’s a chance of them bursting to flames if you do something wrong.
I contemplated LiFePo batteries which are safer and should last a bit longer (~2-3k cycles) but then I found LTO cells (Lithium titanate) cells instead.
Lithium-Titanate cells seem to be so much better for my use for many reasons:
- around 30k cycles or around 30 years of lifetime. I didn’t want to face losing the battery again before starting to seriously use it.
- safe to handle. It seems right next to impossible to get them to burn with puncturing, cutting, overcharging etc. You can see how much abuse they can take here.
- you can charge them fully in 10 minutes and discharge at 10C (400A in my case)
- cold temperatures do not reduce performance nearly as much as they do for li-ion for example. Actually these are rated for operating down to -50C. I might want to drive the robot during the winter too and when the battery is not in use with the robot it will be used for energy storage system at the birdhouse where we have outdoor temperatures.
- over draining or over charging these isn’t as much of a problem as with other Li battery chemistries. You can just pretty much use Lead-acid charger even without BMS if you do not care about getting 100% of capacity out of it. I guess you might also lose some of the theoretical lifetime that way but having such a nice direct lead-acid replacement might be worth it.
There are also downsides of course. Specific energy of the LTO pack is a lot lower than it would be with some other Li chemistries like NMC (73Wh/kg vs. 200Wh/kg) and the price is a bit higher (around 20% for the specific setups that I compared).
So anyway here’s the LTO battery pack I ended up building:
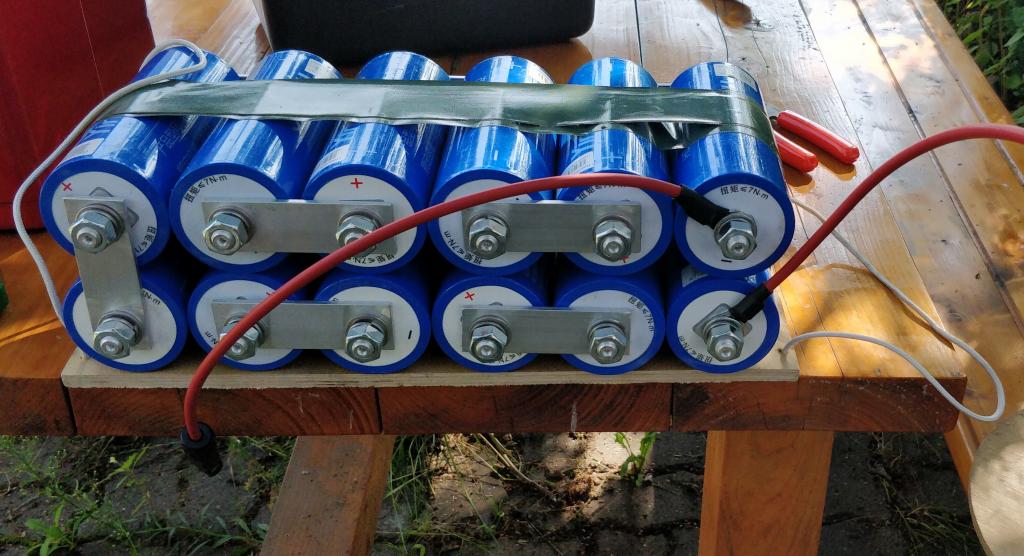
My pack consists of 12 * Yinlong 40Ah 26650 cells. The nominal voltage of these cells is 2.3V so for the pack it is 27.6V.
The busbars connecting the cells are cut from 4mm thick aluminium bar. I contemplated getting a copper bar for that but it’s harder to find and besides the threaded connectors on the cells are made of aluminium anyway.
Controller
I use Sabretooth 2x25A driver. This has worked flawlessly and has taken some serious abuse without any complaints. For example one year I forgot to remove it from the robot for the winter and I discovered it in the spring. Water had somehow gotten into the controller box and the board was frozen in ice.
Just melted it and dried… has worked without any problems.